> ## Documentation Index
> Fetch the complete documentation index at: https://dragonwingdocs-staging.qualcomm.com/llms.txt
> Use this file to discover all available pages before exploring further.
# Quick Start
> Get from zero to a running app on your Qualcomm® dev kit in minutes.
This guide is for the **host machine** setup path. If you're running VS Code
directly on your dev kit, see [Run the Extension
On-Device](./setup-on-device/on-device) instead — the kit is already flashed
and configured, so this wizard doesn't apply.
## Prerequisites
Complete the setup steps before starting this guide:
Set up VS Code on Ubuntu or Windows with WSL.
Download the `.vsix` from Qualcomm Software Center and install it in VS
Code.
Allow USB access for EDL on Linux hosts.
Forward the device from Windows into WSL using usbipd.
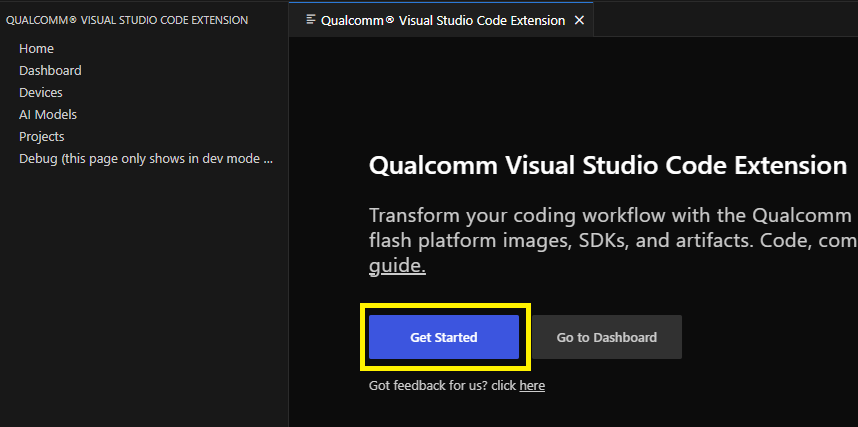
Before continuing, confirm the Qualcomm extension icon is visible in the VS
Code Activity Bar and the **Home** page loads with a **Get Started** button.
***
## Step 1 — Run the Getting Started Wizard
Click **Get Started** on the Home page to launch the setup wizard.
 The wizard configures your host and dev kit in 5 steps:
Select the development kit you want to target. If a device is already connected via USB, the extension detects and pre-selects it. You can also select a kit that is not yet physically connected.
The wizard configures your host and dev kit in 5 steps:
Select the development kit you want to target. If a device is already connected via USB, the extension detects and pre-selects it. You can also select a kit that is not yet physically connected.
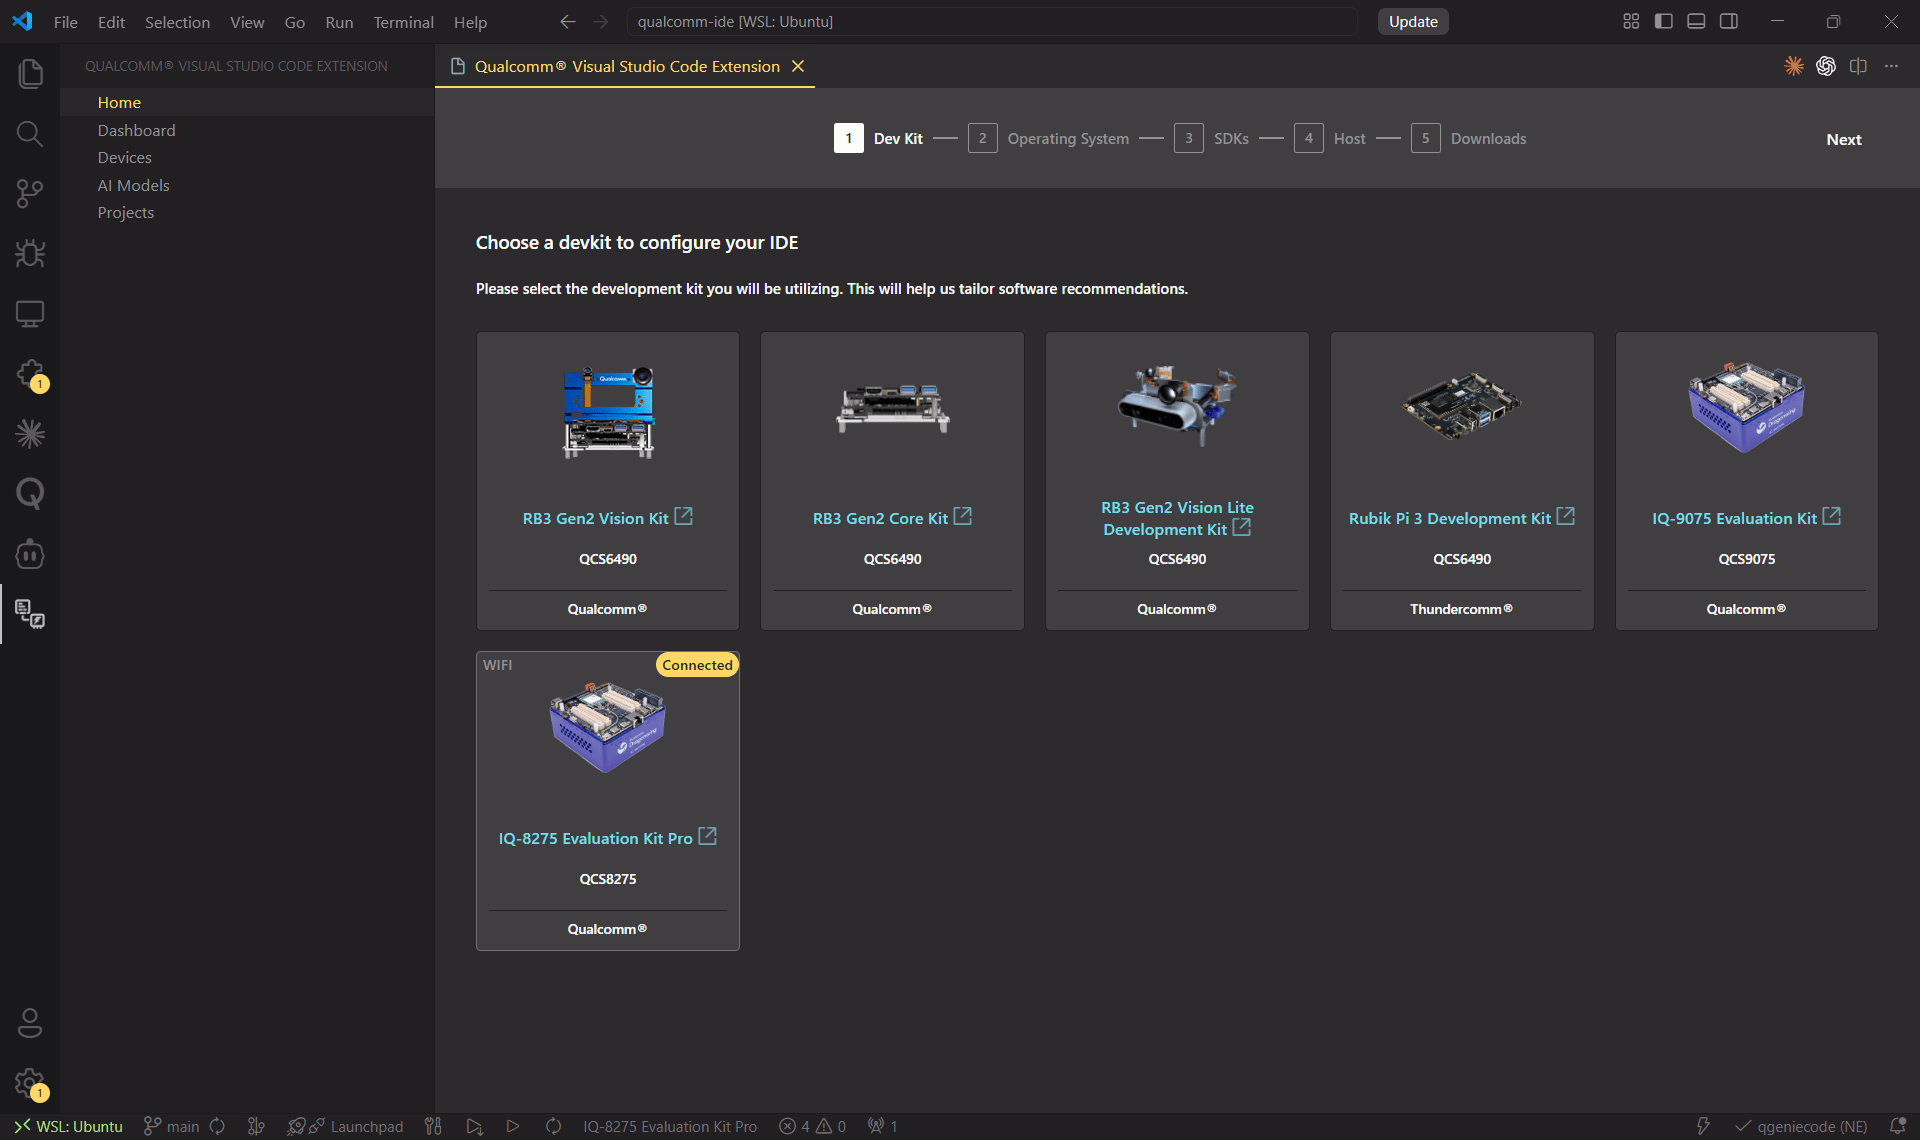 **Qualcomm Device Cloud** support — develop and debug on cloud-hosted devices — is coming soon.
Device not showing up? Verify the USB cable, check `lsusb`, and confirm [udev rules](./setup/udev-rules) and [WSL USB forwarding](./setup/wsl-usb) are configured.
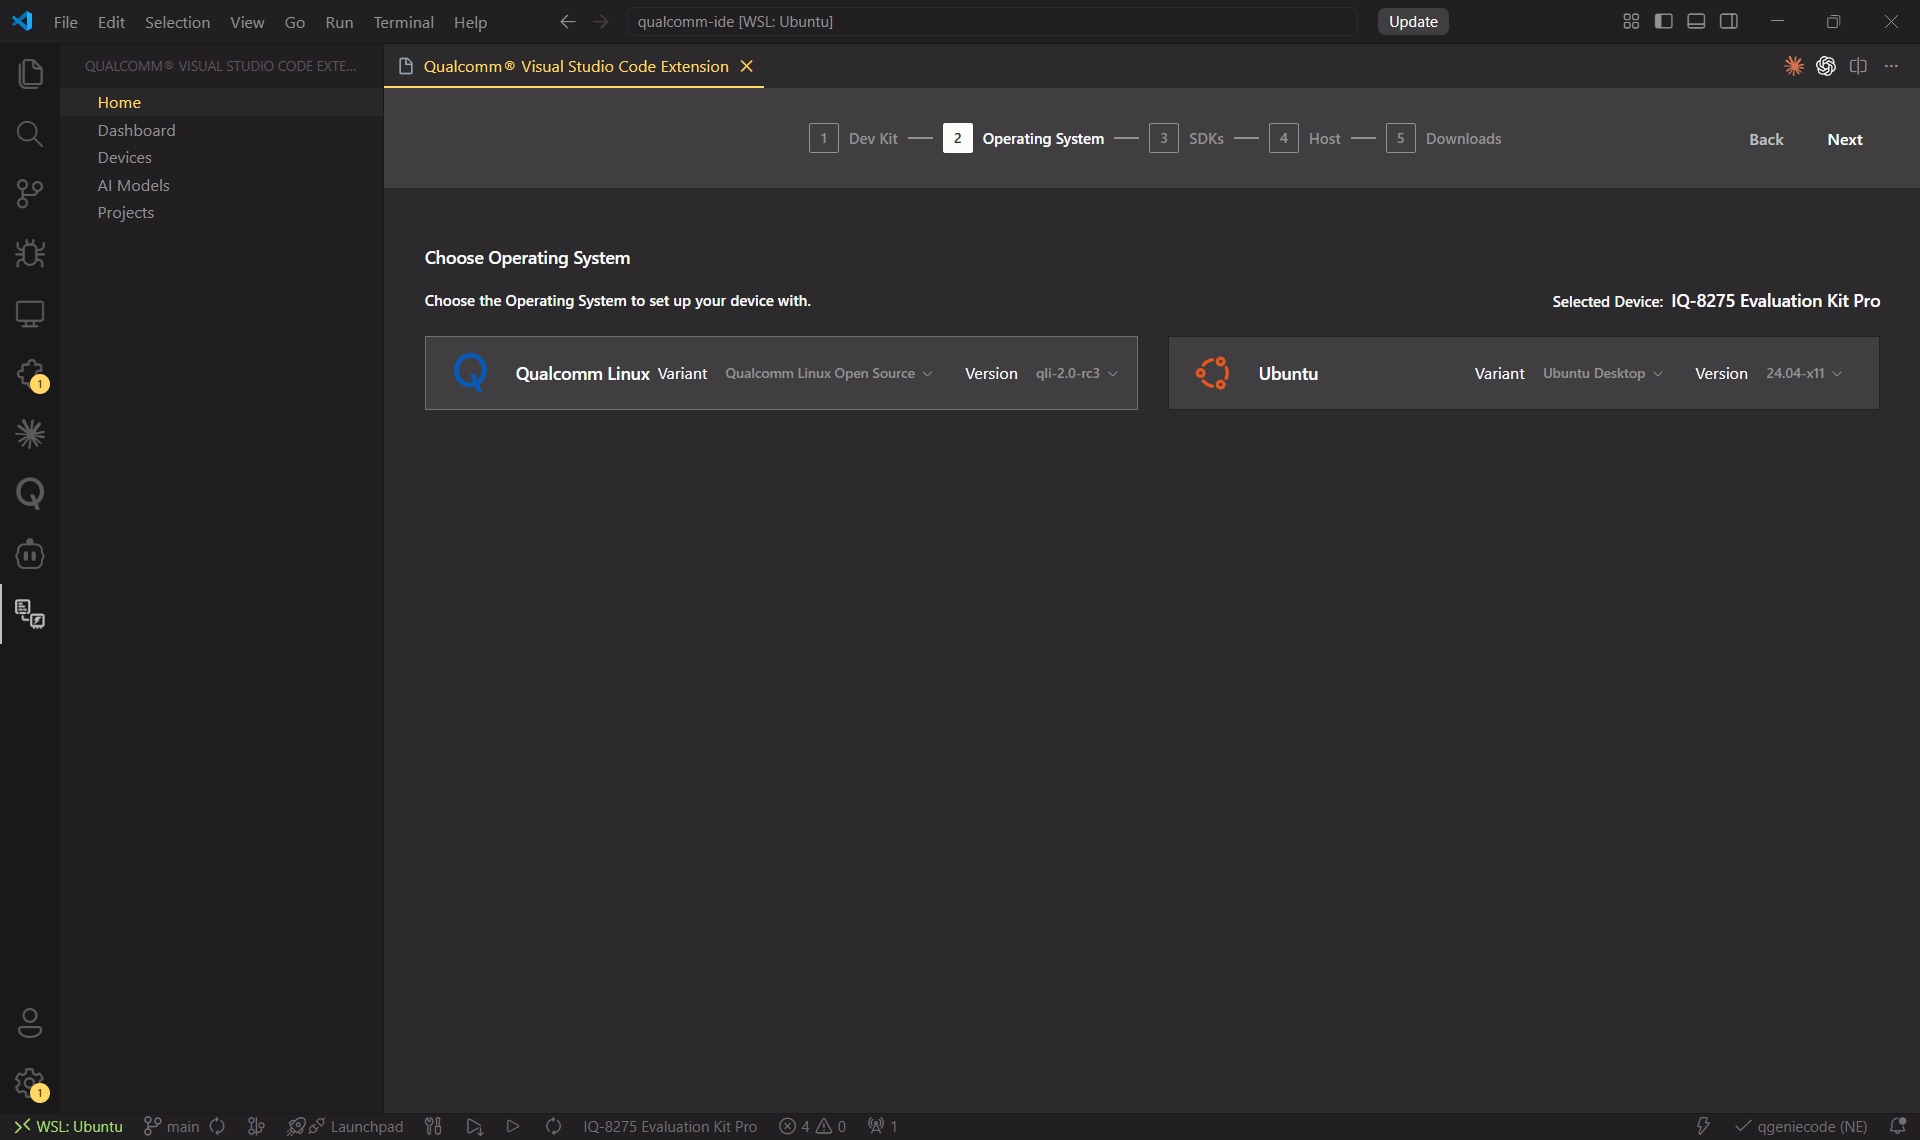
Choose the target OS for the selected dev kit. Select the **Variant** and **Version** using the inline dropdowns. The selected device is shown in the top-right corner.
**Qualcomm Device Cloud** support — develop and debug on cloud-hosted devices — is coming soon.
Device not showing up? Verify the USB cable, check `lsusb`, and confirm [udev rules](./setup/udev-rules) and [WSL USB forwarding](./setup/wsl-usb) are configured.
Choose the target OS for the selected dev kit. Select the **Variant** and **Version** using the inline dropdowns. The selected device is shown in the top-right corner.
 The wizard lists SDKs available for the selected dev kit and OS. Select the version using the inline dropdown. The latest version for your host architecture (x86\_64 or arm64) is pre-selected.
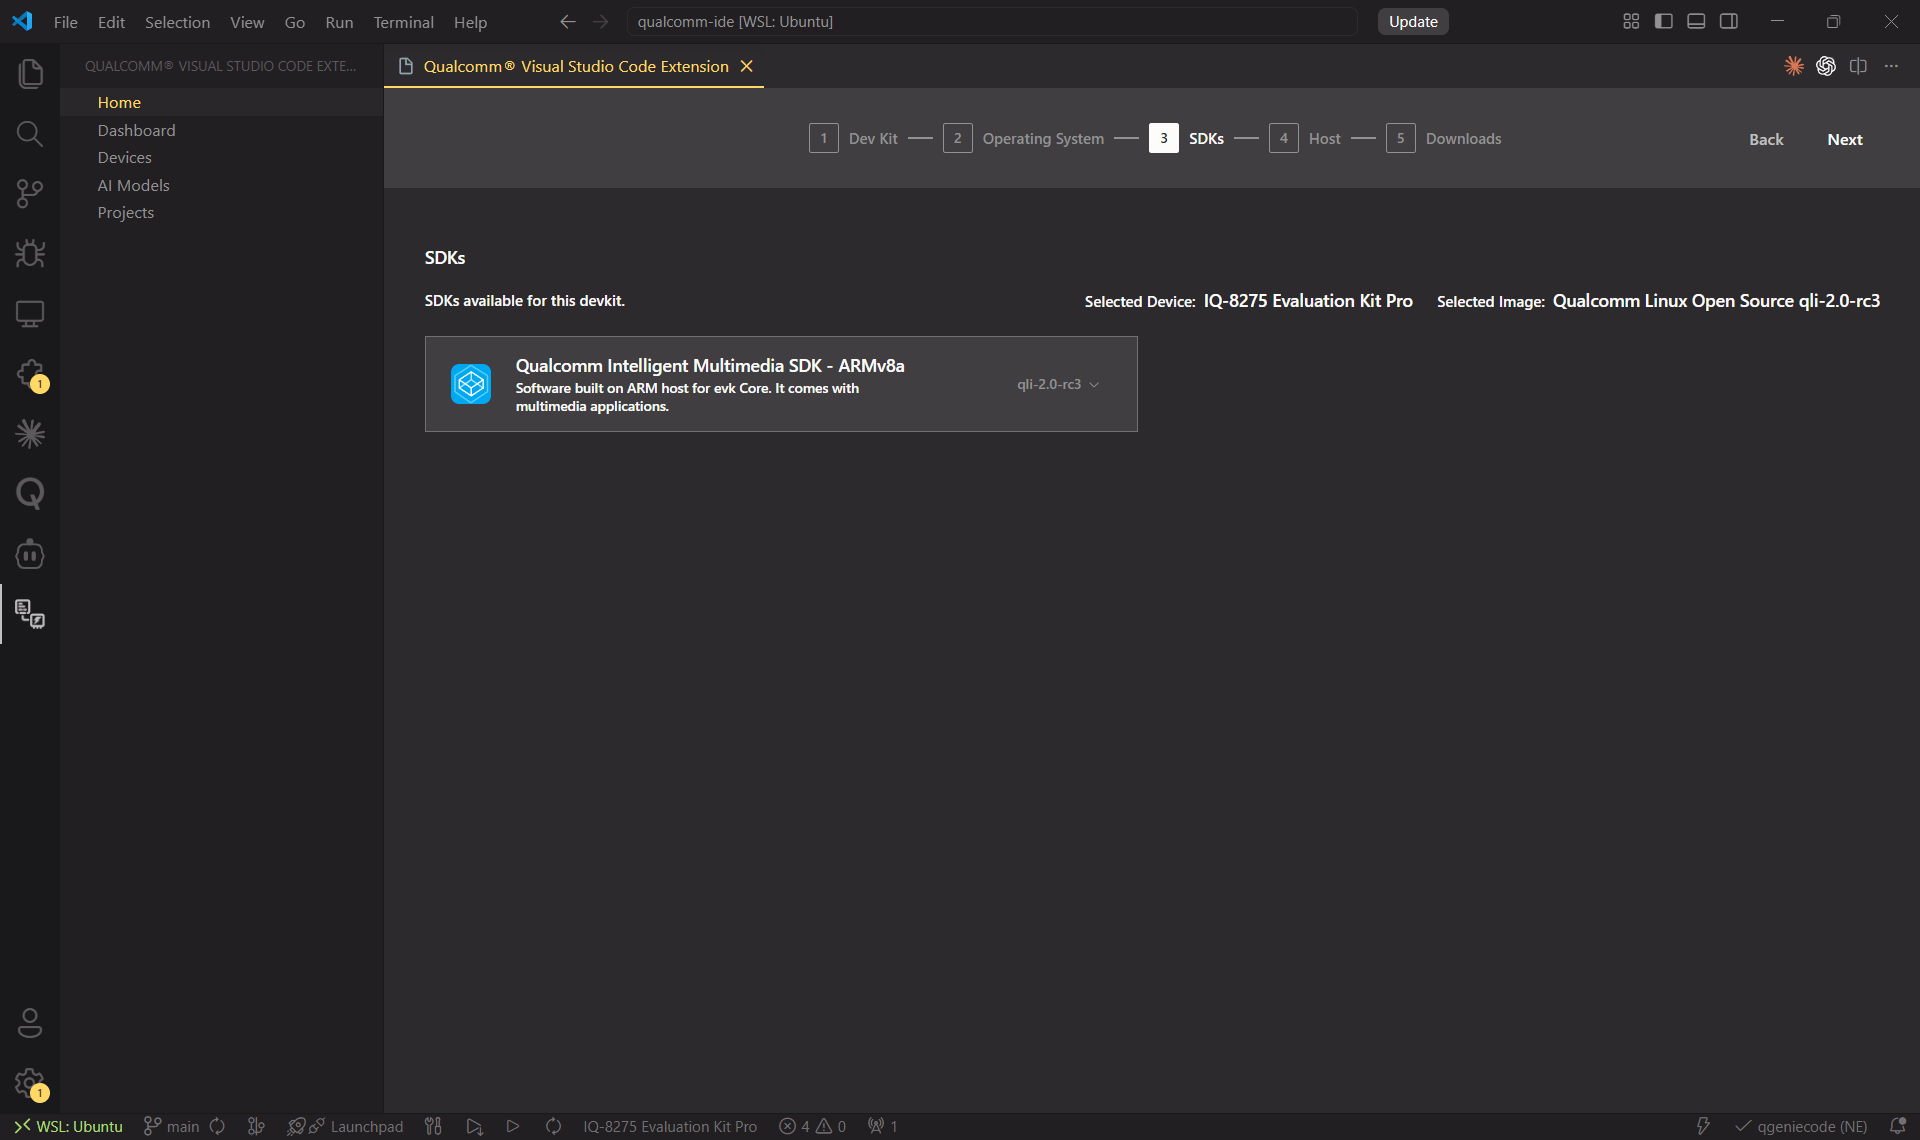 To change the SDK version after initial setup, go to **Dashboard → Downloads → SDK tab**.
Select the development tools to install on your host machine:
To change the SDK version after initial setup, go to **Dashboard → Downloads → SDK tab**.
Select the development tools to install on your host machine:
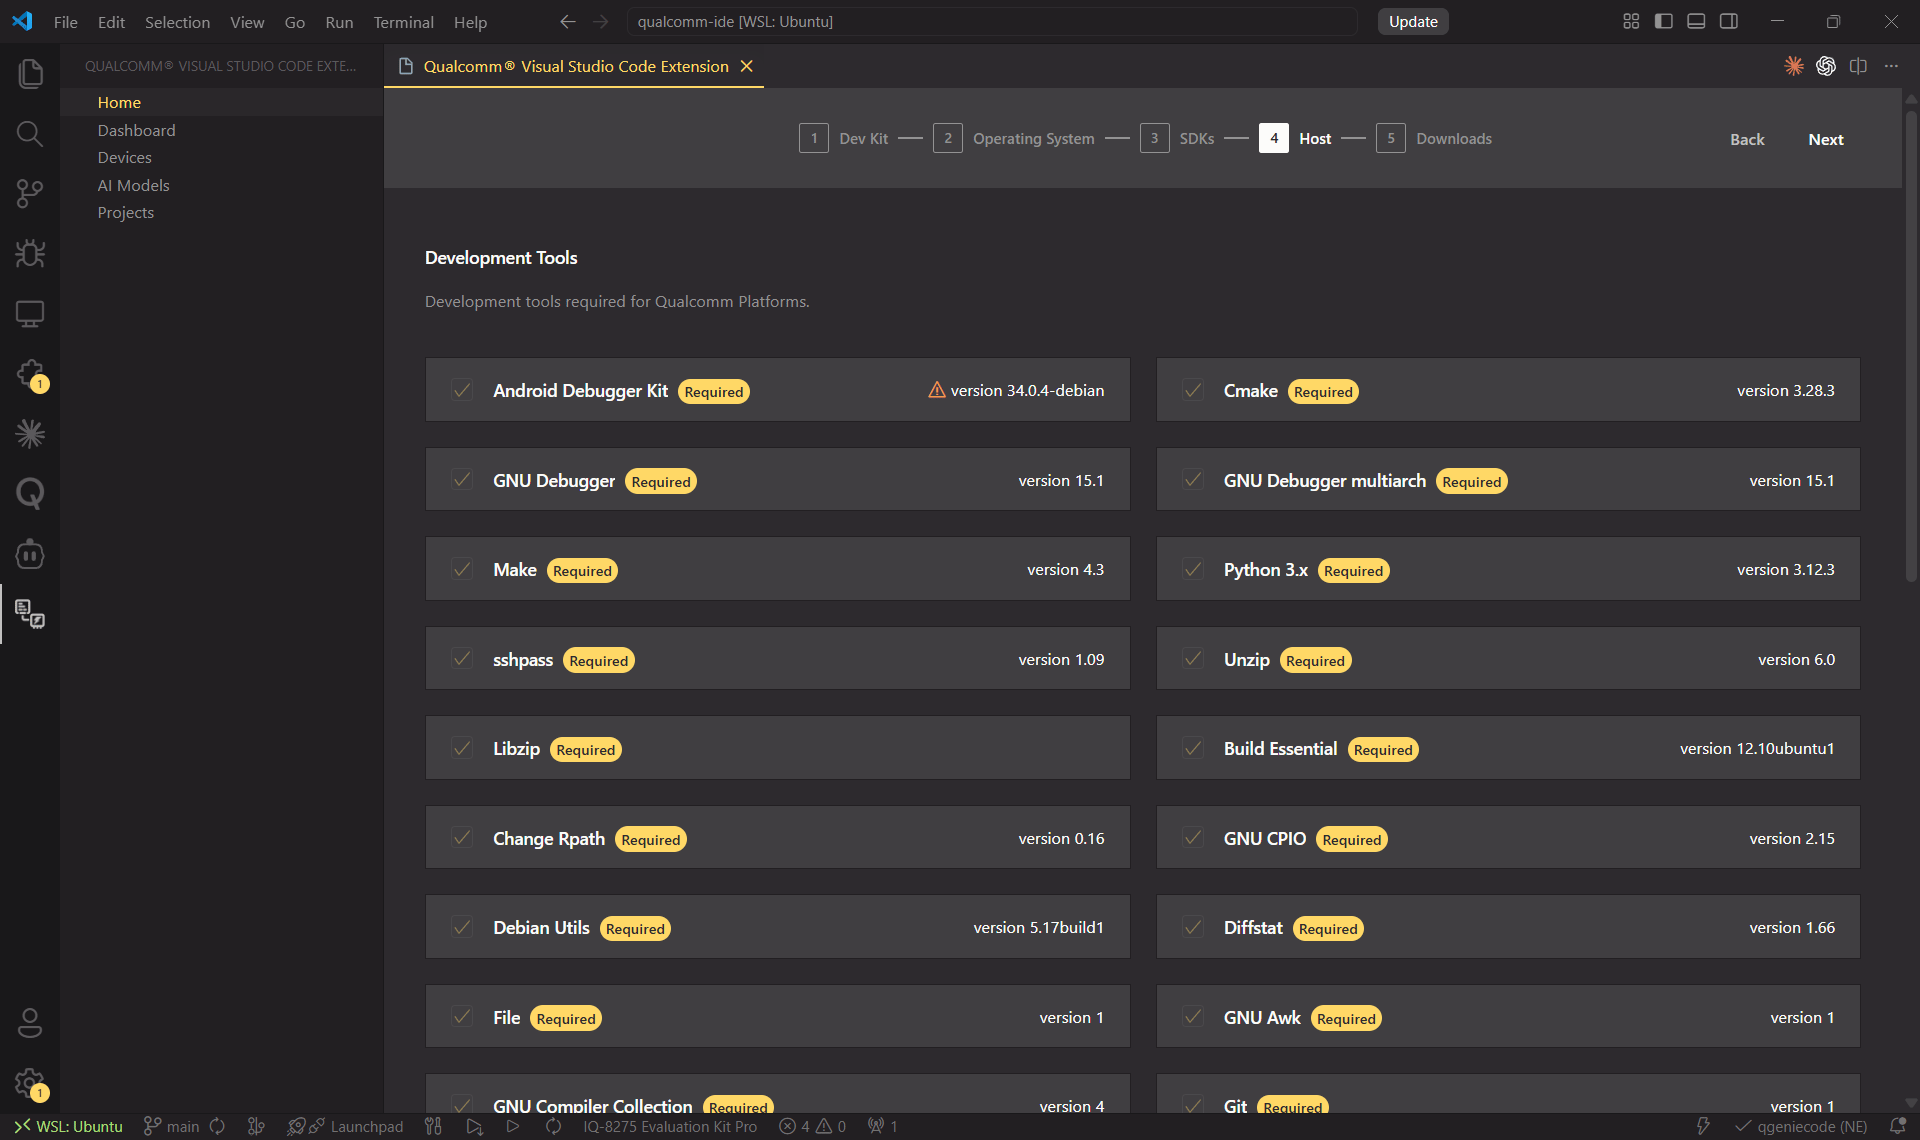 GCC toolchain and debugger.
C/C++ IntelliSense, CMake Tools, and others that enhance the editor.
Keep the defaults if unsure. You can add more tools later from **Dashboard → Downloads**.
Some tools require elevated privileges. Watch the **VS Code Terminal** for `sudo` password prompts (**View → Terminal** if hidden).
Click **Download & Install** to fetch and install everything from the previous steps. Progress is shown across four sections: **Operating System**, **SDK**, **Tools**, and **Extensions**.
GCC toolchain and debugger.
C/C++ IntelliSense, CMake Tools, and others that enhance the editor.
Keep the defaults if unsure. You can add more tools later from **Dashboard → Downloads**.
Some tools require elevated privileges. Watch the **VS Code Terminal** for `sudo` password prompts (**View → Terminal** if hidden).
Click **Download & Install** to fetch and install everything from the previous steps. Progress is shown across four sections: **Operating System**, **SDK**, **Tools**, and **Extensions**.
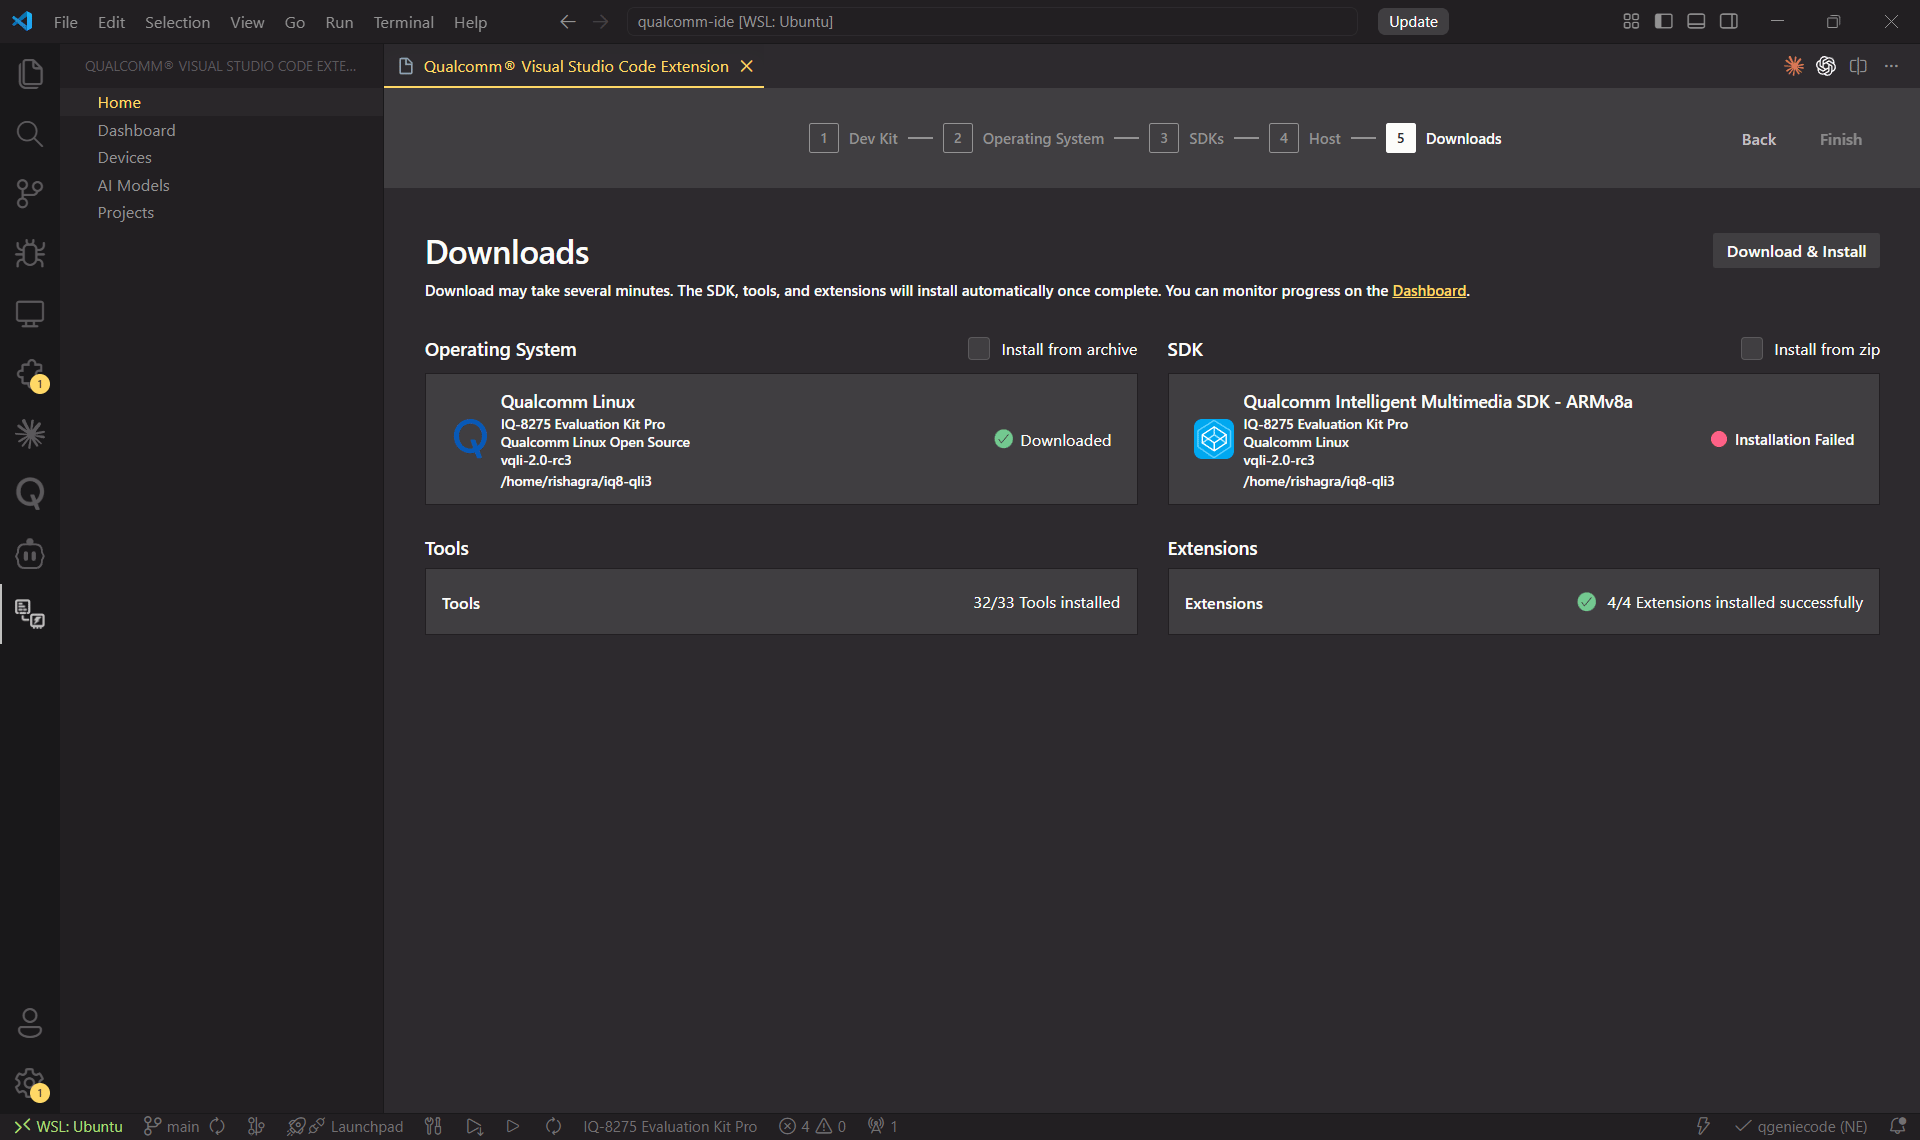 Use **Install from archive** (OS) or **Install from zip** (SDK) to skip the download if you already have the files on disk.
**Do not close VS Code** during the download — interrupted installs can break the toolchain. Watch the Terminal for `sudo` prompts.
After installation, all software appears in **Dashboard → Downloads**:
| Tab | Contents |
| - | - |
| Operating System | OS images for your dev kit — flash directly from here |
| SDKs | Host-side libraries and headers — configure device after install |
| Tools | CLI tools (GCC toolchain, debugger) |
| Extensions | VS Code extensions (C/C++, CMake Tools, etc.) |
***
## Step 2 — Activate Your Device
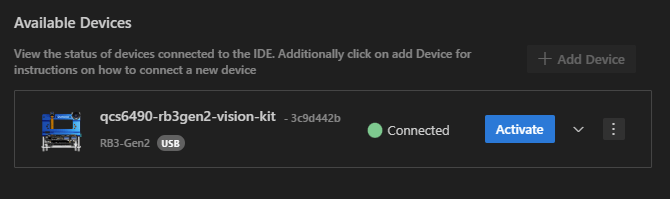
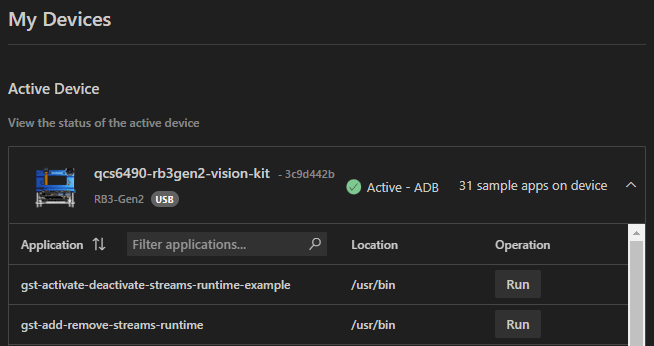
Navigate to the **Device** section and click **Activate** next to your connected device. This sets it as the *Active Device* for builds and flashing.
Use **Install from archive** (OS) or **Install from zip** (SDK) to skip the download if you already have the files on disk.
**Do not close VS Code** during the download — interrupted installs can break the toolchain. Watch the Terminal for `sudo` prompts.
After installation, all software appears in **Dashboard → Downloads**:
| Tab | Contents |
| - | - |
| Operating System | OS images for your dev kit — flash directly from here |
| SDKs | Host-side libraries and headers — configure device after install |
| Tools | CLI tools (GCC toolchain, debugger) |
| Extensions | VS Code extensions (C/C++, CMake Tools, etc.) |
***
## Step 2 — Activate Your Device
Navigate to the **Device** section and click **Activate** next to your connected device. This sets it as the *Active Device* for builds and flashing.
 For devices running Ubuntu OS, see the [Ubuntu Device
Setup](./setup/install-vscode#ubuntu-device-setup) section.
***
## Step 3 — Flash Device Software
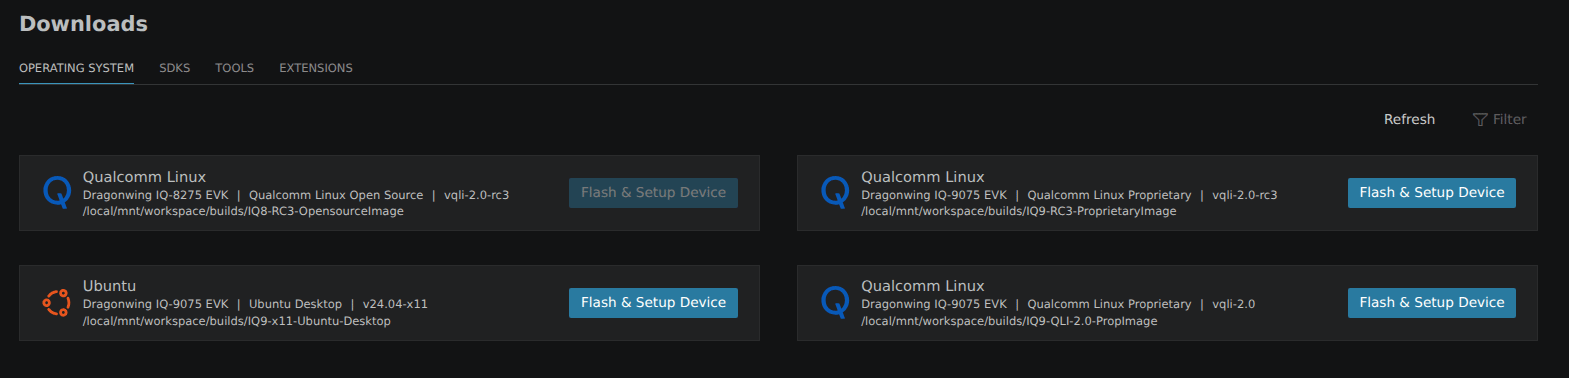
Open **Dashboard → Downloads → Operating System tab** and click **Flash & Setup Device** next to the image for your dev kit.
For devices running Ubuntu OS, see the [Ubuntu Device
Setup](./setup/install-vscode#ubuntu-device-setup) section.
***
## Step 3 — Flash Device Software
Open **Dashboard → Downloads → Operating System tab** and click **Flash & Setup Device** next to the image for your dev kit.
 **Do not disconnect the device during flashing.** An interrupted flash can
destabilize the device and may require power-cycle + manual EDL + reflash to
recover.
***
## Step 4 — Develop Your Application
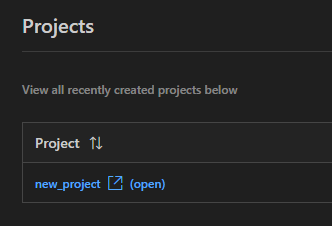
Navigate to **Projects** to browse sample projects or import templates from the SDK. IntelliSense is configured automatically when a project is open.
**Do not disconnect the device during flashing.** An interrupted flash can
destabilize the device and may require power-cycle + manual EDL + reflash to
recover.
***
## Step 4 — Develop Your Application
Navigate to **Projects** to browse sample projects or import templates from the SDK. IntelliSense is configured automatically when a project is open.
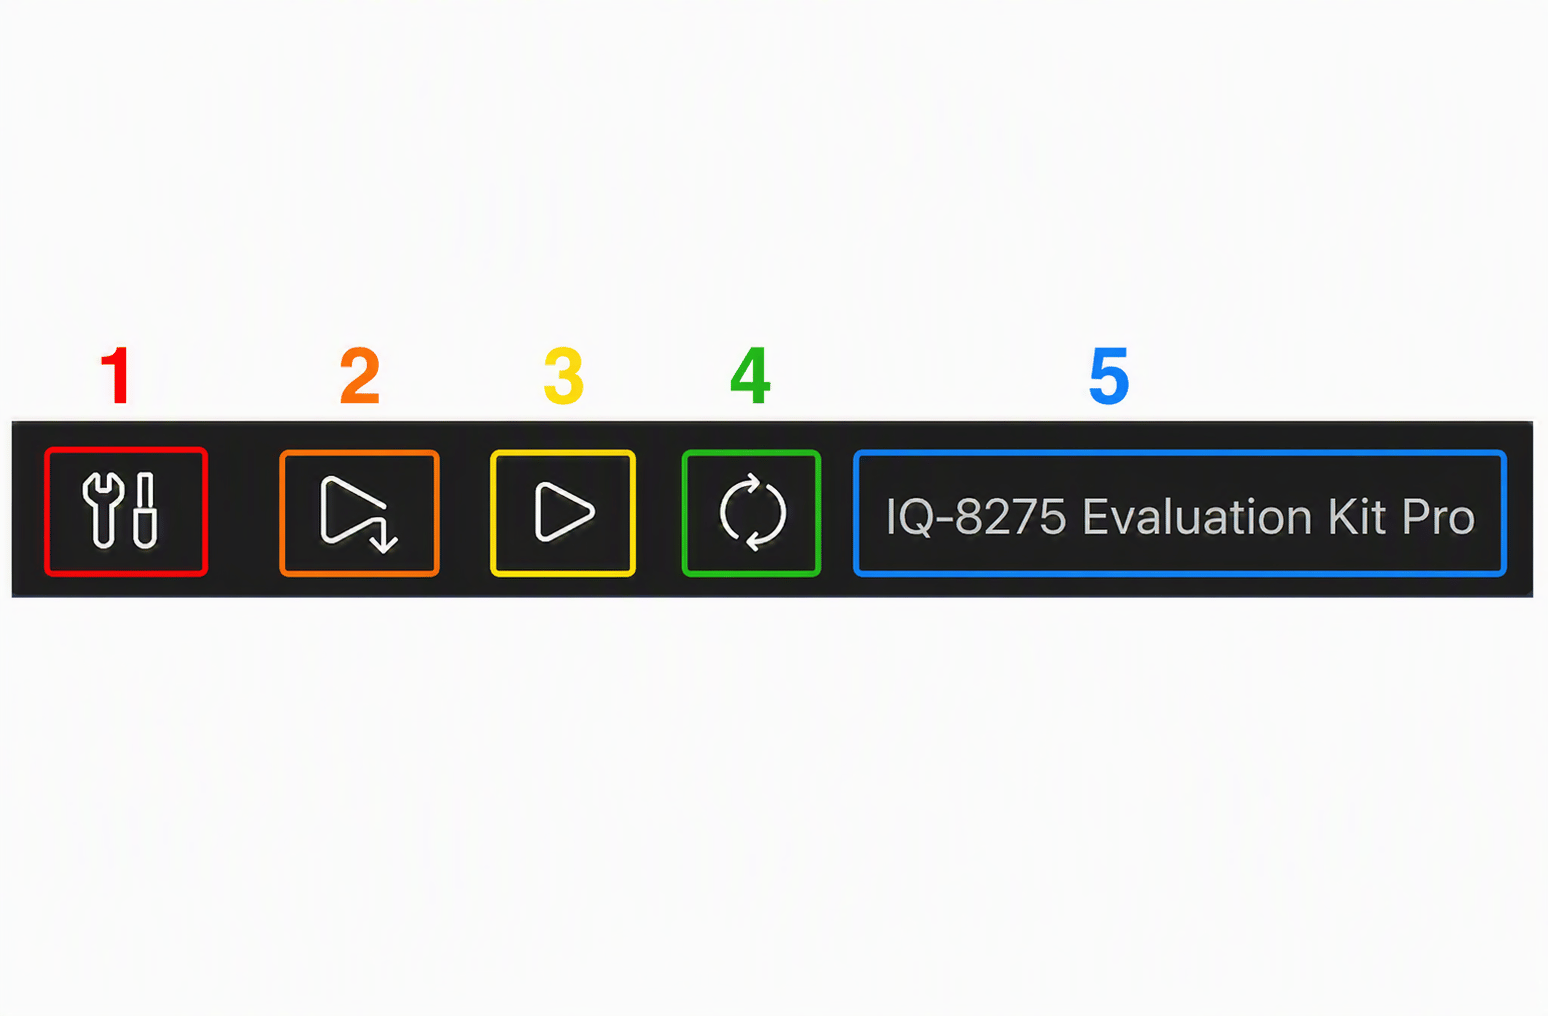
 Use the **Status Bar buttons** to build, deploy, run, and select your target device:
Cross-compile the application for the active device.
Build and push the binary to the active device.
Execute the deployed binary on the device.
Re-scan for connected devices.
Choose which connected device to target.
Use the **Status Bar buttons** to build, deploy, run, and select your target device:
Cross-compile the application for the active device.
Build and push the binary to the active device.
Execute the deployed binary on the device.
Re-scan for connected devices.
Choose which connected device to target.
 By default, **Deploy** installs the binary at `/usr/bin`, overwriting any
existing binary with the same name on the device.
By default, **Deploy** installs the binary at `/usr/bin`, overwriting any
existing binary with the same name on the device.