> ## Documentation Index
> Fetch the complete documentation index at: https://dragonwingdocs-staging.qualcomm.com/llms.txt
> Use this file to discover all available pages before exploring further.
# Status Bar
> Build, deploy, and run your application from the VS Code status bar.
## Status Bar Actions
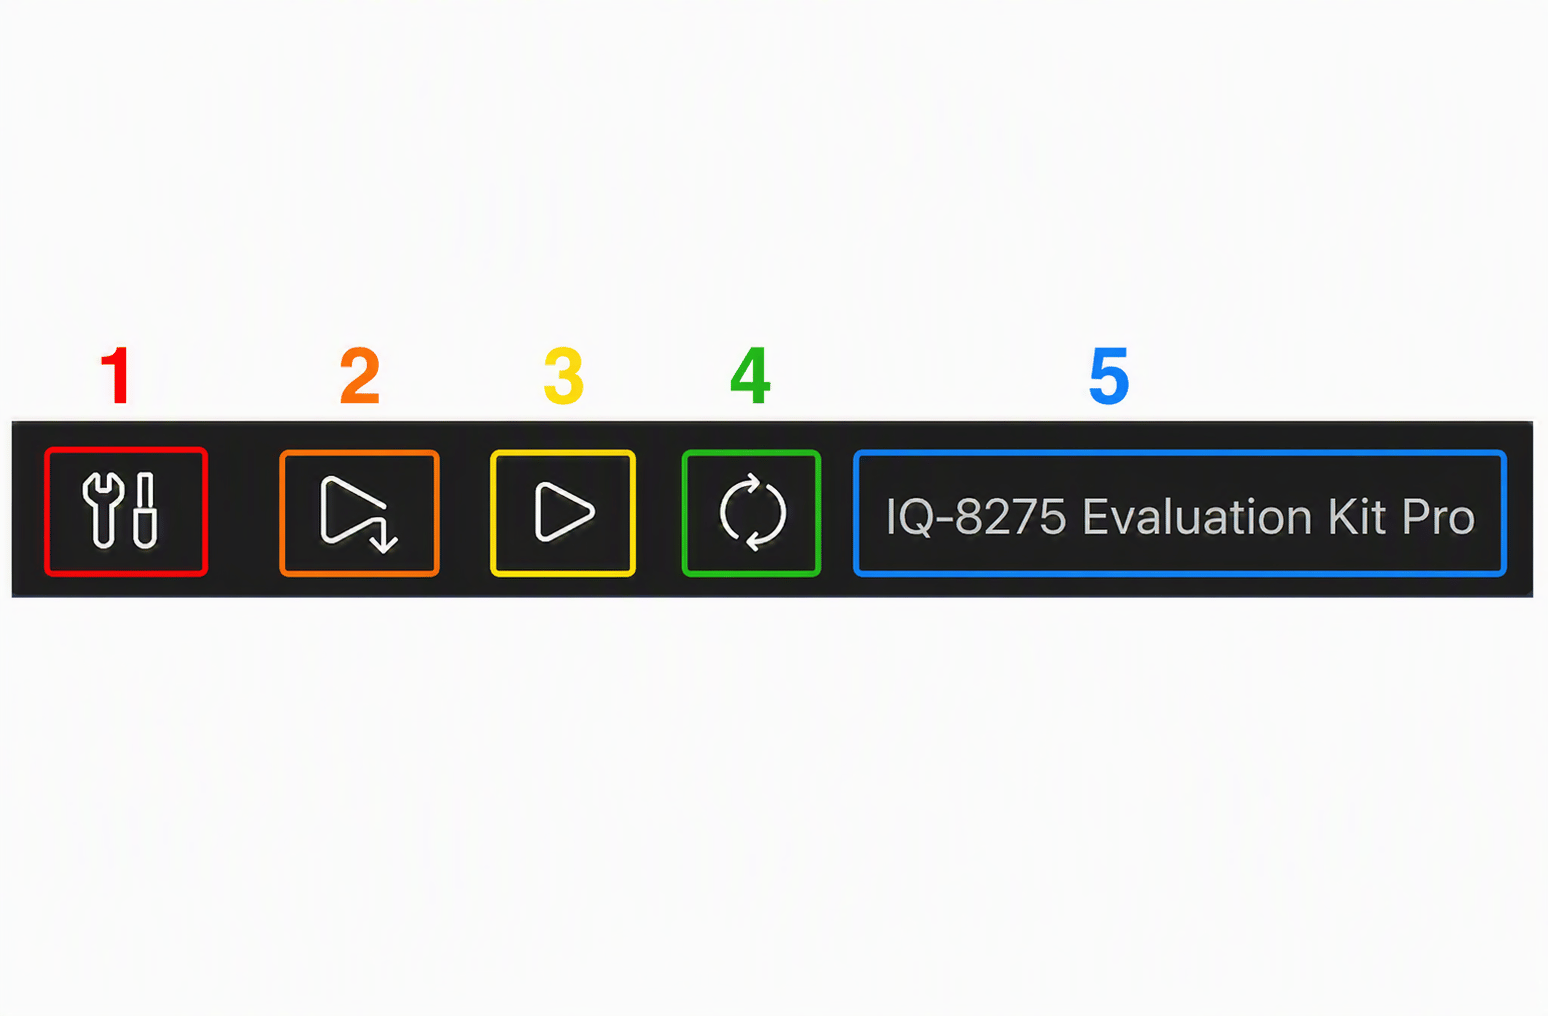
The VS Code Status Bar at the bottom of the window contains action buttons added by the extension:
 | # | Button | Action |
| - | - | - |
| 1 | **Build** | Cross-compile the project for the active device |
| 2 | **Deploy** | Build + push the binary to the device |
| 3 | **Run** | Execute the deployed binary on the device |
| 4 | **Refresh Device** | Re-scan for connected devices |
| 5 | **Select a Connected Device** | Choose which connected device to target |
**Deploy** installs the binary at `/usr/bin` by default. This **overwrites any
existing binary** with the same name on the device. Rename your output binary
if you want to keep multiple versions.
## Build
Click **Build** (or run the `Build` task via `Ctrl+Shift+B`). The extension uses the SDK toolchain configured by the workspace and compiles the project.
```bash CMake project theme={null}
cmake -B build -DCMAKE_TOOLCHAIN_FILE=$QSC_TOOLCHAIN
cmake --build build
```
```bash Make project theme={null}
make -j$(nproc) CROSS_COMPILE=$QSC_CROSS_PREFIX
```
## Deploy
Click **Deploy**. The extension compiles the project (same as Build) and then pushes the binary over SSH.
```bash theme={null}
# Equivalent SCP push
scp ./build/my-app user@:/usr/bin/my-app
```
## Run
Click **Run** to execute the deployed binary on the active device. The extension launches the binary over SSH and streams its output to the integrated terminal.
```bash theme={null}
# Equivalent SSH invocation
ssh user@ /usr/bin/my-app
```
## Debug
Click in the gutter next to a source line to set a breakpoint.
Click **Debug** in the Status Bar or press `F5`.
The debug panel provides access to: - **Variables** pane — local and global
variable values - **Watch** pane — custom expressions - **Call Stack** —
full call chain from the breakpoint - **Registers** — hardware register
contents - **Disassembly** — mixed source + assembly view - **Memory** — raw
memory inspection
The debug configuration is auto-generated in `.vscode/launch.json`. Edit this
file to change the remote target address, binary path, or GDB/LLDB arguments.
## Troubleshooting builds
The `.vscode/c_cpp_properties.json` file may be stale. Run **QVSCE: Regenerate Workspace** from the Command Palette (`Ctrl+Shift+P`) to regenerate it.
Verify the active device is correctly set in **Dashboard → Devices**. Check that SSH connectivity is working:
```bash theme={null}
ssh user@ echo ok
```
Ensure the binary was compiled with debug symbols (`-g` flag). Verify that `gdbserver` is installed on the device — run `which gdbserver` over SSH to confirm.
| # | Button | Action |
| - | - | - |
| 1 | **Build** | Cross-compile the project for the active device |
| 2 | **Deploy** | Build + push the binary to the device |
| 3 | **Run** | Execute the deployed binary on the device |
| 4 | **Refresh Device** | Re-scan for connected devices |
| 5 | **Select a Connected Device** | Choose which connected device to target |
**Deploy** installs the binary at `/usr/bin` by default. This **overwrites any
existing binary** with the same name on the device. Rename your output binary
if you want to keep multiple versions.
## Build
Click **Build** (or run the `Build` task via `Ctrl+Shift+B`). The extension uses the SDK toolchain configured by the workspace and compiles the project.
```bash CMake project theme={null}
cmake -B build -DCMAKE_TOOLCHAIN_FILE=$QSC_TOOLCHAIN
cmake --build build
```
```bash Make project theme={null}
make -j$(nproc) CROSS_COMPILE=$QSC_CROSS_PREFIX
```
## Deploy
Click **Deploy**. The extension compiles the project (same as Build) and then pushes the binary over SSH.
```bash theme={null}
# Equivalent SCP push
scp ./build/my-app user@:/usr/bin/my-app
```
## Run
Click **Run** to execute the deployed binary on the active device. The extension launches the binary over SSH and streams its output to the integrated terminal.
```bash theme={null}
# Equivalent SSH invocation
ssh user@ /usr/bin/my-app
```
## Debug
Click in the gutter next to a source line to set a breakpoint.
Click **Debug** in the Status Bar or press `F5`.
The debug panel provides access to: - **Variables** pane — local and global
variable values - **Watch** pane — custom expressions - **Call Stack** —
full call chain from the breakpoint - **Registers** — hardware register
contents - **Disassembly** — mixed source + assembly view - **Memory** — raw
memory inspection
The debug configuration is auto-generated in `.vscode/launch.json`. Edit this
file to change the remote target address, binary path, or GDB/LLDB arguments.
## Troubleshooting builds
The `.vscode/c_cpp_properties.json` file may be stale. Run **QVSCE: Regenerate Workspace** from the Command Palette (`Ctrl+Shift+P`) to regenerate it.
Verify the active device is correctly set in **Dashboard → Devices**. Check that SSH connectivity is working:
```bash theme={null}
ssh user@ echo ok
```
Ensure the binary was compiled with debug symbols (`-g` flag). Verify that `gdbserver` is installed on the device — run `which gdbserver` over SSH to confirm.